Thursday 20 December 2012

Sunflower & Pumpkin Seed Buns (No-Knead)


Need I say more?

On those days that you are short of time but crave for some homebaked buns, this is it. The no-knead bread. Prepare the dough a day ahead, pop into fridge for the night. The next day, take it out and shape, proof and bake. All done in less than an hour. Breezy.


Banana Walnut Bundt Cake


An encore to my 'accidental success'.

This time, I tripled the amount and bake it in my 10" bundt pan.

Yummily unbelievably deliciously fanta-bulous! All gone in 2 days.

I'm convinced, the secret lies with the yogurt. it yields a very moist and tender cake. I usuallyu use Vanilla yogurt and not plain yogurt. My reasoning was Vanilla yogurt is sweeter than plain yogurt hence i can reduce the sugar in the cake, and I can omit / reduce the need for vanilla essence too!

Two birds.

I proudly declare it is no longer accidental if you can repeat the success. hahahaaaaaaa...


Here's what you'd need:

* 150gm unsalted butter
* 170gm sugar
* 2 1/2 eggs (room temperature; lightly beaten)
* 325gm plain flour
* 1 1/4 tsp baking soda
* 1/2 tsp baking powder (heaping)
* 1 1/4 tsp salt
* 200gm yogurt
* 325gm banana (mashed; about 4 long bananas; fully ripen)
* Handful of walnuts (toasted / dry fried; coarsely chopped)


This is what I did:

1. Lightly grease the bundt pan, making sure the funnel is greased as well. Sprinkle some walnuts in the pan.

2. In a mixer, cream butter and add sugar gradually in 2-3 batches. Make sure it is well combined before each addition.

3. Add in egg little by little. Beat till creamy.

4. Add in salt and mix well.

5. Mash bananas with a fork and add into mixture. Mix well gently.

6. Sift together the dry ingredients: Flour, Baking Soda and Baking Powder

7. Add in 1/3 flour mixture and mix well, followed by yogurt and mix well.

8. Add in remaning flour. Use a spatula to fold into mixture till you do not see any more traces of flour. Be careful not to over stir the batter. Once flour is incorporated, STOP.

9. Add in chopped walnuts and mix well.

10. Pour into bundt pan. Give it a slight knock to release air bubbles, and even out the mixture accordingly. [If you had sprinkled some walnuts in the pan, you'd need to tap more rigorously, else, you will end up with those pockets of holes like mine (see pictures); it didn't bother me, just in case it bothers you...]

11. Bake in pre-heated oven at 180degC for 60 - 70 minutes, till golden brown and thoroughly cooked. Check doneness with a toothpick. (I had to bake this long cos of its sheer size)

12. Remove it from oven and let it cool slightly in the tin for 5-10mins.

13. Remove cakes from tins and serve warm. Or you may even prepare some chocolate ganache and pour over the cake. That would be lovely! (slurp)

Wednesday 5 December 2012

Pandan Chiffon Cake

As you can see, I am on the chiffon roll. In less than 10 days, I have done all that I have ever wanted to do... Coffee Chiffon, Chocolate Chiffon, Orange Chiffon*, Mango Yogurt Chiffon*, and this -- an all time Singapore signature -- Pandan Chiffon!

No chiffon baking is complete without this really. Whether you succeed is secondary, the FAQ will always be "Have you baked a Pandan Chiffon?"

The most informative site I found was from ieatishootipost. He writes really well (ahem, of course, he's a d-o-c-t-o-r alright!). I learnt a lot from his analysis of this temperamental cake. Yet when it comes to my turn to put my hands on this, I totally forgot to 'revise' his notes and I happily went with Wendy's. With all due respect to my Guru, my cake didn't turn out as well as I had anticipated (my bakes from her always succeed). Sorry Wen, I don't know what went wrong. I followed you to the T.

So what happened?

First, it says to mix coconut milk with pandan juice, which I did. And to it, add the flour, which I also did. Instead of a well mixed batter, I get a dough! I gasped and slapped my forehead. I read and reread the Steps again, checked and counter-checked my measurements, umpteen times, just to doubly sure I understood it right. No mistake about it. That was what it said. And so I discarded the dough, and collected a new set of ingredients and I went back to the drawing board.

This time, I did it my way.

Beat egg yolk with sugar till very pale, ie, ribbon stage. Then I added the coconut milk, then the pandan juice, and then the flour in 3 successions.

And the whites, and the folding, and the knocking and the blar blar blar...

Popped into the oven, and went on my life. For 45 mins.

Peek-a-Boo... Can you see the cake up there? 
It hung sooooo dearly onto the pan when cooling inverted. I was happy.

But it wasn't browned. And it shrank a lot as it cools. I left it hanging for about 2 hours before unmolding the cake. And the top cracked, though many will tell you it doesn't matter coz you serve a chiffon upside down.

Taste? Very good I must say! I reduced the sugar from the yolk to 50gm and it tasted just right. But my Mother said it wasn't light and airy like a chiffon ought to be. It is dense and heavy (well, not exactly d-e-n-s-e dense but just denser and heavier than a chiffon), and I don't know why... This is when my doggedness come in, TRY AGAIN!

I have a tall glass of freshly squeezed pandan juice in my fridge, and so I believe I will try another pandan chiffon recipe, once I re-gain my courage.

I ought not quit till my glass of Pandan Juice is depleted, or till I succeed in achieving an air-borne chiffon.

(*Not posting coz it didn't pass the Jury's test)

Here's what you'd need:

Egg Yolk
* 5 egg yolks
* 50gm sugar (original recipe uses 100gm)
* 150gm cake flour (or plain flour)
* 180gm coconut milk (I used Kara, will use UHT coconut milk next time)
* Pinch of salt
* 70gm freshly squeezed pandan juice (concentrated)
* Droplet of Pandan essence or Green colouring (optional; to heighten taste and colour respectively)

Egg White Meringue
* 5 egg whites
* 1/4tsp cream of Tartar
* 100gm sugar

This is what I did:

1. Preheat your oven to 170degC.

2. Separate your eggs into two mixing bowls. Yolks and Whites.

3. With a paddle attachment, beat your egg yolk till light and add in the sugar. Till very pale in colour (liken softened butter; ie, ribbon stage).

4. Add in Coconut milk. Stir on KA Speed 1. Add in Pandan Juice on Speed 1. Drop in a droplet of pandan essence or colouring. 

5. In 3 successions, add in flour and on Speed 1, stir to mix. Set batter aside.

6. With a whisk, beat your egg whites till frothy. Speed 6.

7. Add in Cream of Tartar, and continue to beat till runny. In 3 successions, add in the sugar. On Speed 8, beat till stiff peak.

8. Fold 1/3 of the meringue into the egg yolk batter, and another 1/3. Eventually, the reminder. Fold gently and be careful not to deflate the meringue.

9. Pour into an ungreased chiffon pan. Level the batter and gently tap the pan to release any trapped air bubbles in the batter.

10. Bake for 40-45mins. Midway (once the cake is puffed up), reduce temperature to 160degC and continue baking.

11. Check doneness with a toothpick.

12. Invert the chiffon to cool completely in the pan. Upside down. Let it cool completely.

13. Unmold and serve. 


Tuesday 4 December 2012

Eggless Tiramisu with Kahlua

The time has come finally for my Tiramisu to see the living daylight (rather, the night). I have thought long and hard on what to bring to a friend's dinner. Can't quite go to a dinner emptyhanded. I could bring wine, but someone has volunteered that. Oh lucky she!


But I wondered how the Tiramisu would fare really. Considering the weather in Singapore and the distance I have to travel to bring this to a friend's place... I was rather apprehensive.

I wondered if I should add gelatin to my cheese mixture... in hope to just set the cheese a bit tougher. Or should I use a ice box? That would be rather ridiculous looking, won't it? But I couldn't afford for my tiramisu to 'melt'. Perhaps I should immediately send it to friend's freezer or chiller for a quick 30mins before serving it at dessert.


Then I became anxious if it would pass the taste test. These friends have travelled the world countless times over, tasted endless delicacies and seen a million sights, why would they be 'wow' with a home-made Tiramius?! Sighz... sometimes I think I too much. Just Serve It, Nike would say.

And so I did. This time, I added Kahlua to the cake since there will be NO kids at the dinner. HURRAY!!! It is an all adults night! YIPPIE!!!

Just one more picture. Had to do this coz the cake really looked very happy!


As always, no one rejects a Tiramisu. As a dessert to a tummy bursting dinner, the light Kahlua-ed mascarpone cheese joyously "pick you up"! I could have added more Kahlua next time.


Pandan Juice

Shrek-like drink. Bottoms up? 

I have heard my Mom told me many times how to make your own Pandan Juice. I have seen my MIL done this couple of times. But it took me this long to give this a try. And man! If I had listened more intently and do this earlier myself, I would be one happier baker!

The stubborn streak in me can be rather annoying at times, especially when it doesn't serve any good purpose. *sheepish grin*. Yet my dogged-ness is a trait I refused to relent nor give up nor surrender. It is exactly coz of my "never say die" attitude that has endeared me to many (or so I like to think. Ha!)

I call it Perseverance.

Oh well, back to this, it is soooooooooooooooooo easy! Gosh. No sweat really.


Snip a few stalks of pandan leaves, as fine as you can, with a pair of razor sharp scissors. Place them into a blender, and add an equal amount of water (ie, if you manage to get one cup of cut leaves, then add one cup of water). And puree them away till it resembles moss.


Strain and squeeze those mossy leaves (oh the texture is quite nice on my hands! I kinda like it. Wonder if that's how moss feels like.... yeek!). And repeat the blending with a second cup and 3rd cup of water... reducing the water a little each time you puree them.

The first cup is the best and it just kinda gets lighter as you go along. Measure what you will need and keep the rest in the fridge. It keeps very well; as long as it doesn't start smelling like rotten leaves. After a couple of hours in the fridge, the concentrate of the pandan will settle at the bottom of the container. Now, that is the BEST! Use it for your prized bakes.

No prize for guessing what cake I'm going to bake next.


Chocolate Chiffon Cake


I love this cake.

Truth be told, after a night of chilling, it started to taste like Lana Chocolate Cake (minus the ganache)!! No kidding!

I would die to find the recipe I used to make this. Sadly enough, I lost it and apparently there was no record of it. Not in my iPad, nor iPhone, nor even my baking scribble journal. It simply vanished!


The "dampness" was due to insufficient folding. My fault. 

It is a tragedy. I have no recollection whose recipe I used. Wail.

Saturday 1 December 2012

Coffee Chiffon Cake


This experience reminded me of my college days. Accountacy. Eeeeek! You how it's like to do Journal Entries where your Balance Sheet (BS) must balance at the end of the day? While all students should gladly let out a sigh of relief and throw a celebration when their BS balances, I tremble and cringe. For me, trouble looms ahead if my BS ever balances. My BS should not must not cannot balance. It never did. While I may not get a high score when that happened, at least I passed. Yet the one time when I managed to square it, I failed the Paper!

Do you even know what I am talking about?

Through the countless attempts at baking a chiffon, I was all confident and steady. I was so sure my chiffons would succeed. But they never did. It always shrink, topple, deflate, and so often, my ego. All the time.
A bit off color here coz of lighting

This day I mumbled to myself that this will be another failed cake. Coz my egg white measurement wasn't correct, and I didn't bother to correct it. I added coffee emulco, meaning now a wetter batter, and I didn't know what to do with the wet-dry ratio. Didn't think my folding was right; thought it look rather deflated... I was so discouraged that the only thing left for me to do, was to chuck it into the oven and leave it to its own fate.

Coz everything looked wrong.

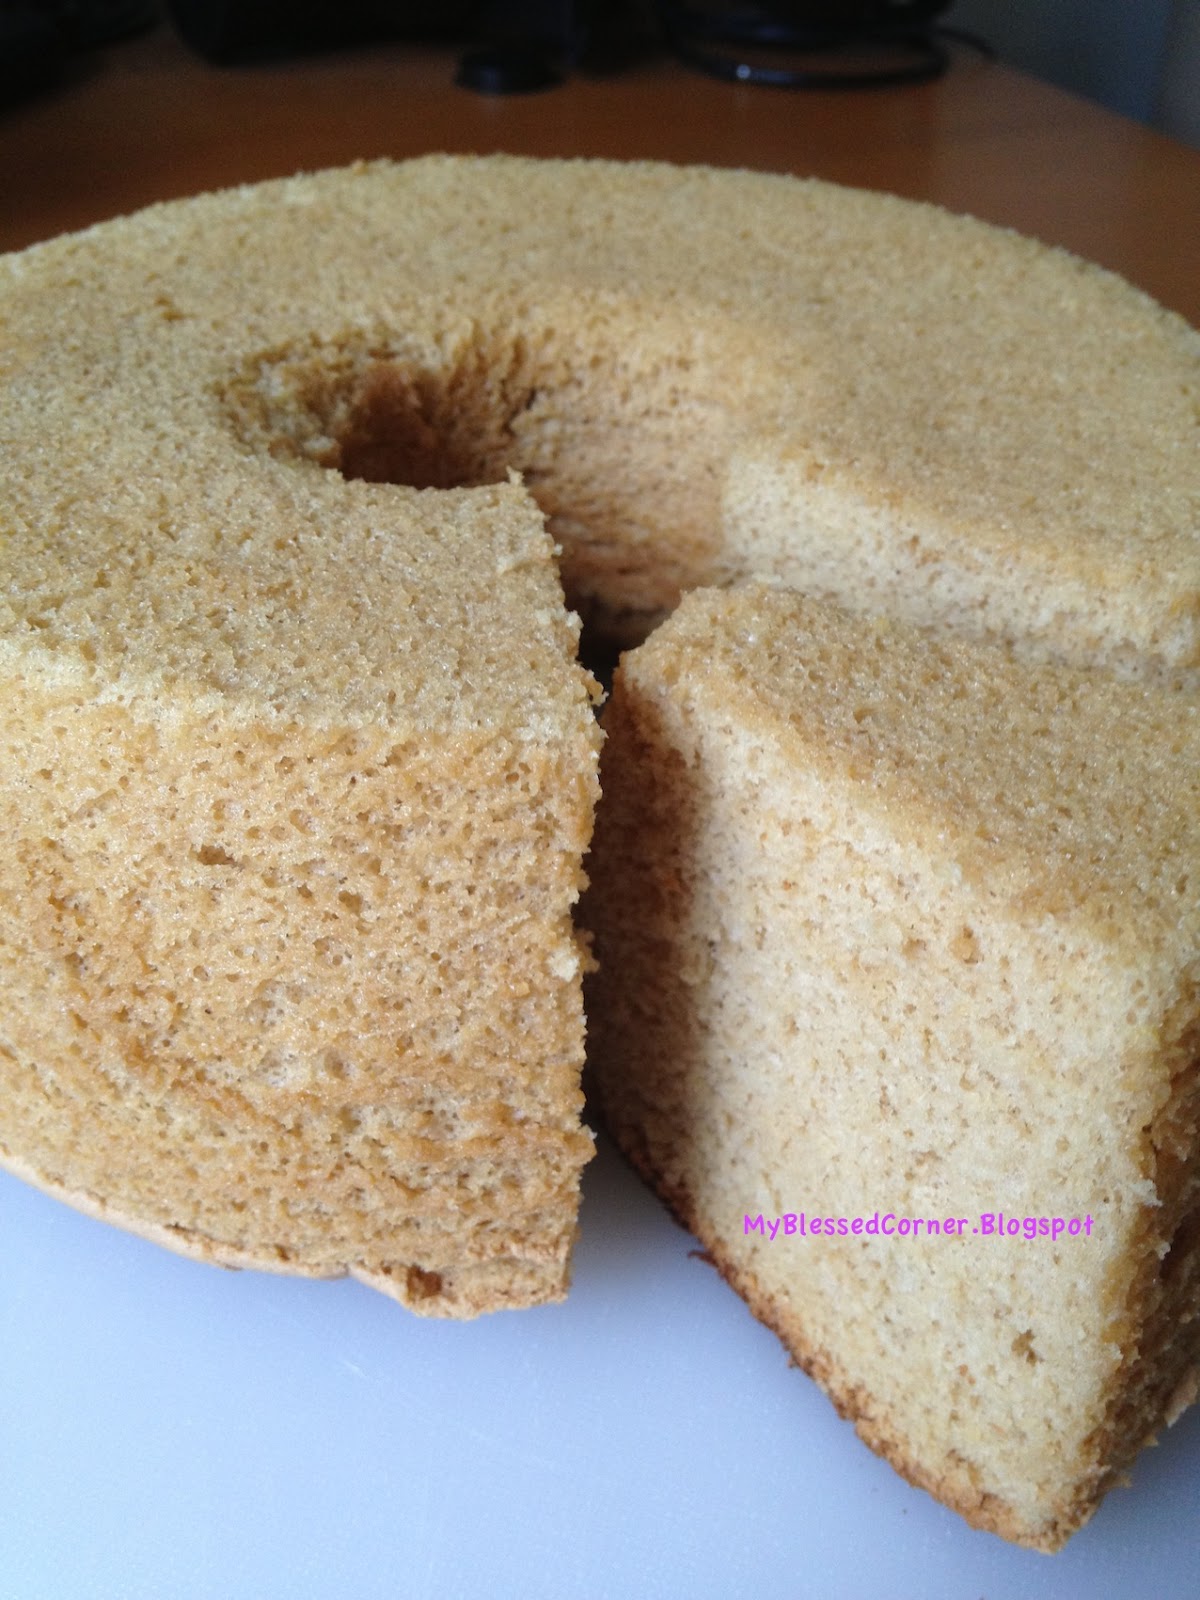
Lo and behold! The cake rose! High and mighty. And eventually hanging upside down holding on tightly for its dear life. I MADE IT! What a day!! What an awesome feeling of victory!!! I felt like the top of the world!

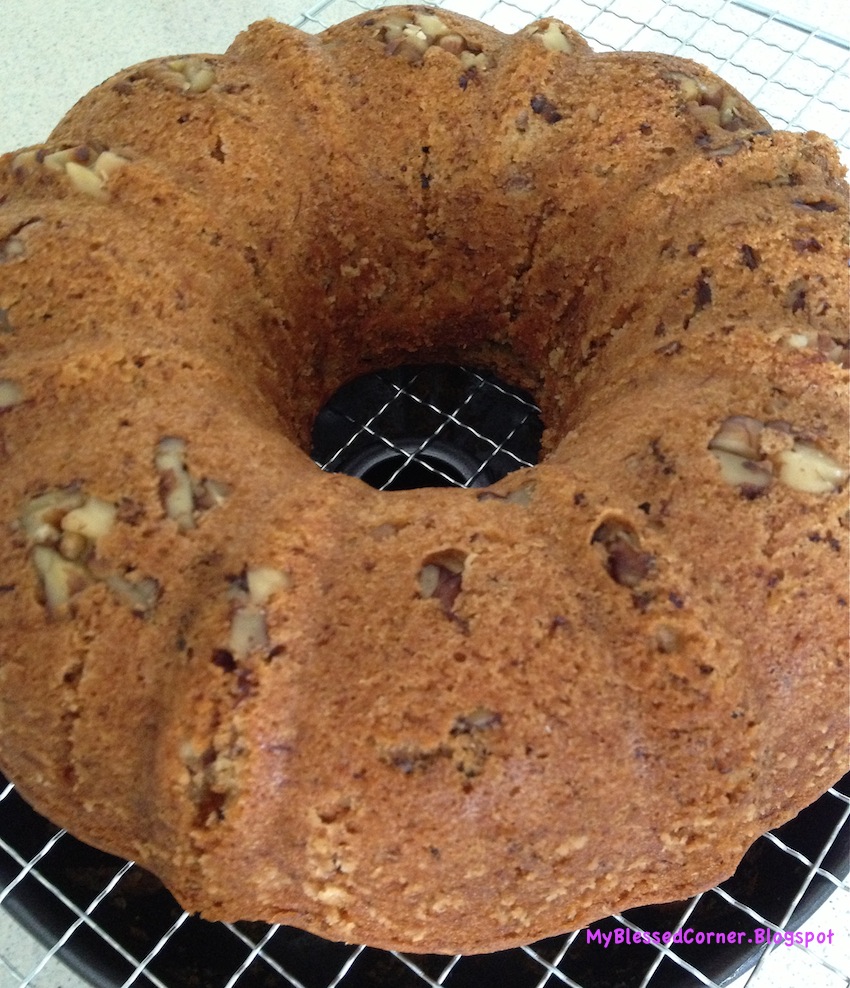
Now! This is the actual rich browning!
Not only did the cake rose, it is nicely browned! Wahoooooo!!!

The only thing though, it slipped off the pan not long after I inverted it. I suspect that was coz I opened the oven at least twice to check on the baking, which possibly have caused the cake to shrink from the sides of the pan. I later googled and learnt NOT to open the door; observe through the glass door only.

But it was fully baked. Fluffy and light. And the aroma of caffeine... wooo lah lah...

I adapted my recipe from both of these sites, Small Small Baker (whom I read every now and then) and this other NeedMoreNoms. Both were using Kelvin Chai's recipes (which I think I read somewhere, not many people had successes from his book... oh well...)

A little adaption here and there, and da darh... my 7-inch chiffon is born!

Here's what you'd need (7" ie. 21cm chiffon cake tin)

Egg Yolk Batter:

50ml milk
2 tbsp espresso coffee
4 egg yolks
50gm caster sugar
50m cooking oil
1/4tsp coffee emulco (optional)
100gm top flour w/ 1tsp baking powder (alternatively 100gm self raising flour)
Pinch of salt

Egg White Meringue:
5 egg whites (about 150gm; should have been 161gm(
1/4tsp cream of tartar
100gm caster sugar

This is what I did:

1. Preheat your oven to 170degC.

2. Separate your eggs into two mixing bowls. Yolks and Whites.

3. Prepare the cup of 50ml milk and scoop away 2 tbsp. Replace with 2tbsp of freshly brewed coffee (cooled, I used espresso).

4. With a paddle attachment, beat your egg yolk till light and add in the sugar. Till very pale in colour (liken softened butter; ie, ribbon stage).

5. Add in the cooking oil, milk/coffee mixture, coffee emulco, and stir on KA speed 1 to mix. Ensure all in incorporated.

6. In 2 successions, add in flour and on Speed 1, stir to mix. Set batter aside.

7. With a whisk, beat your egg whites till frothy. Speed 6.

8. Add in Cream of Tartar, and continue to beat till runny. In 3 successions, add in the sugar. Increase speed to 8, and beat till stiff peak.

9. Fold 1/3 of the meringue into the egg yolk batter, and another 1/3. Eventually, the reminder. Fold gently and be careful not to deflate the meringue.

10. Pour into an ungreased chiffon pan. Level the batter and gently tap the pan to release any trapped air bubbles in the batter.

11. Bake for 40-45mins. Midway (once the cake is puffed up), reduce temperature to 160degC and continue baking.

12. Check doneness with a toothpick.

13. Invert the chiffon to cool completely in the pan. Upside down. I used an inverted mug to suspend the cake mid-air on the pan's funnel (well, it sure looks hideous! if you know of a more glamourous way, let drop me a line!) Let it cool completely.

14. Unmold and serve. I find the flavour more intense the next day after a day of chilling in the fridge.